As a dedicated proxy navigating the chaotic yet thrilling streets of New Eridu, I've encountered my fair share of challenges within the Hollow Deep Dive system. Most missions are a straightforward test of combat prowess, but every so often, the game throws a curveball that makes you pause and think. The Invisible Assistant quest, a pivotal part of Chapter 2's Interlude, is exactly that kind of mission. It's not just about fighting; it's a clever blend of stealth, observation, and logic puzzles that truly tests your versatility. I found it to be a refreshing and engaging departure from the norm, forcing me to use my wits alongside my weapons. Let me walk you through how I tackled this intricate mission, step by step, so you can claim all its secrets for yourself.
How I Successfully Followed the Elusive Target

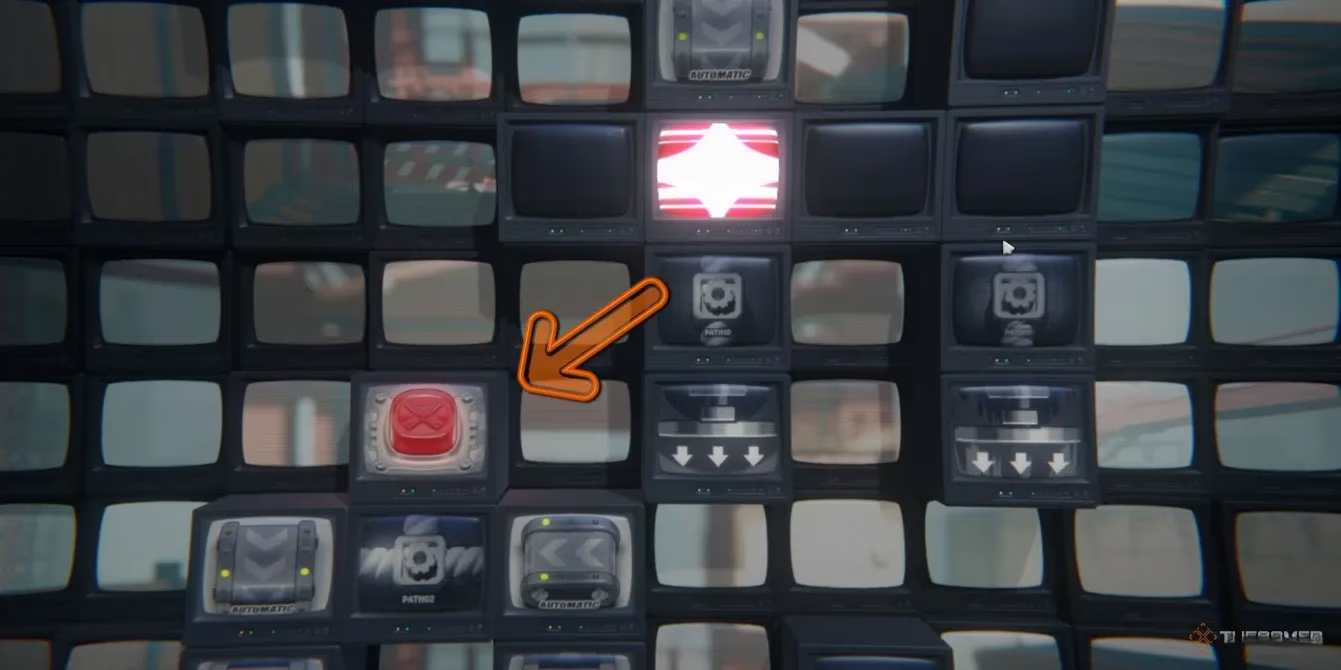
The mission begins with a classic tailing operation. Your target, another proxy, is actively trying to evade the ever-watchful eyes of Zhu Yuan and Qingyi. This isn't a simple follow-along; you have to be discreet and use the environment to your advantage. My first move was to locate and press the red button on the bottom right of the starting area. This action is crucial as it activates parts of the environment that allow you to progress.
From there, the path unfolds through a series of mechanical interactions:
-
I used the pistons to reach higher platforms.
-
I navigated a network of conveyor belts to get within range of the next button.
Each button press not only advanced my pursuit but also revealed valuable Dennies scattered around. After collecting these, another set of conveyor belts led me to my first piece of Observation Data, a key collectible. This initial section perfectly sets the tone, blending light puzzle-solving with exploration before the real brain-teasers begin.
Solving Every Single Circuit Puzzle: My Logic Process
After the opening act, the mission introduces its core mechanic: circuit puzzles. You'll find switches marked with a red cross. Interacting with them transports you to a separate puzzle screen where you must rotate rows of circuits to connect the power source to the endpoint. Here are the exact solutions I used to solve all three:
| Puzzle Number | My Solution (Row rotations from top to bottom) | Visual Result |
|---|---|---|
| #1 | Rotate the only row twice. | A simple straight connection. |
| #2 | Rotate the first row once, second row twice. | The path snakes to connect. |
| #3 | Rotate the first row once, second & third row twice. | The most complex path, forming a complete circuit. |
💡 My Pro Tip: Don't overthink these! The solutions are methodical. Think of each rotation (click) as moving the circuits a quarter-turn. It's a satisfying \u201caha!\u201d moment when the power finally flows.
Claiming the Final Golden and Purple Crates: A Treasure Hunter's Guide
The reward for solving the third puzzle isn't just progress\u2014it's treasure! Right there in the puzzle chamber, a gleaming Golden Crate and a mysterious Purple Crate taunted me. Of course, I wasn't leaving without them. Here’s the precise route I took:
For the Golden Crate:
-
I moved to the top-left corner of the area.
-
I used the piston located there to ascend to the crate's platform.
-
After grabbing the loot, I hopped onto the conveyor belt right next to the crate, which safely deposited me back on the main path. Easy!
For the Purple Crate (This one's trickier!):
-
I took the conveyor belt at the very top of the main area.
-
This belt led me to a secluded spot featuring a Denny TV and, importantly, a piston directly beneath it.
-
I activated that piston, which took me to another small sub-area.
-
There, I found a second piston to the left. Using that one finally granted me access to the coveted Purple Crate.
This crate hunt felt like a mini-adventure within the mission, and the rewards (often high-grade materials or Polychromes) are absolutely worth the extra minute of exploration. 🎁
Final Thoughts and Combat Preparation
With the puzzles solved and every last crate securely in my inventory, the path forward was clear. The Invisible Assistant quest concludes as most Zenless Zone Zero stories do: with an explosive confrontation. The mission seamlessly transitions from quiet, logical puzzle-solving into the high-octane combat the game is known for. I found myself perfectly primed for the fight—my mind sharpened by the puzzles and my resources bolstered by the hidden crates. This quest is a brilliant example of the game's diverse design, proving that being a proxy in New Eridu requires both brawn and brains. If you're stuck, just remember: follow the buttons, solve the circuits methodically, and never, ever leave a crate behind!
Comments