Time waits for no Proxy, and in 2026 the Hollows are just as greedy for your time as they were two years ago. The Survivor Rescue Exploration Commission in Zenless Zone Zero is one of those sneaky missions that looks like a walk in the park—until you realize the game expects you to balance rescuing helpless Bangboo stragglers with hoarding enough Gear Coins to unlock all the Hollow Observation Data. Miss a single coin pile and your reward tier goes down the drain faster than a noodle shop’s soup stock. But fear not! With a little planning and a whole lot of sass, you’ll have this commission wrapped up tighter than a Bangboo in a blanket.
This guide walks you through every single route, step by step, so you can collect each survivor, every last Gear Coin, and all three pieces of Hollow Observation Data without breaking a sweat. Think of it as a grocery list for a hero—except the veggies are traumatized mechanical rabbits and the coupons are shiny coins. Stick to the paths marked below, follow the arrows starting from the Bangboo, and you’ll be swimming in Inter-Knot rep before you can say “How did I ever get lost in this place?”
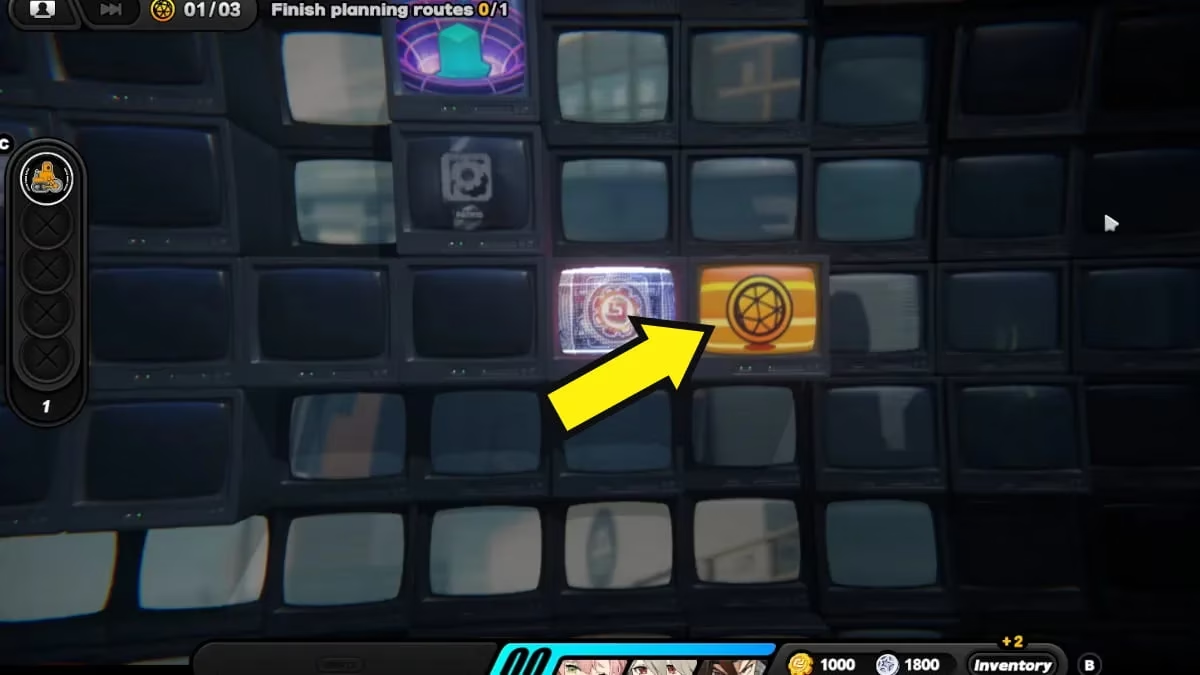
Route #1: The Tutorial That Tries to Lull You Into a False Sense of Security
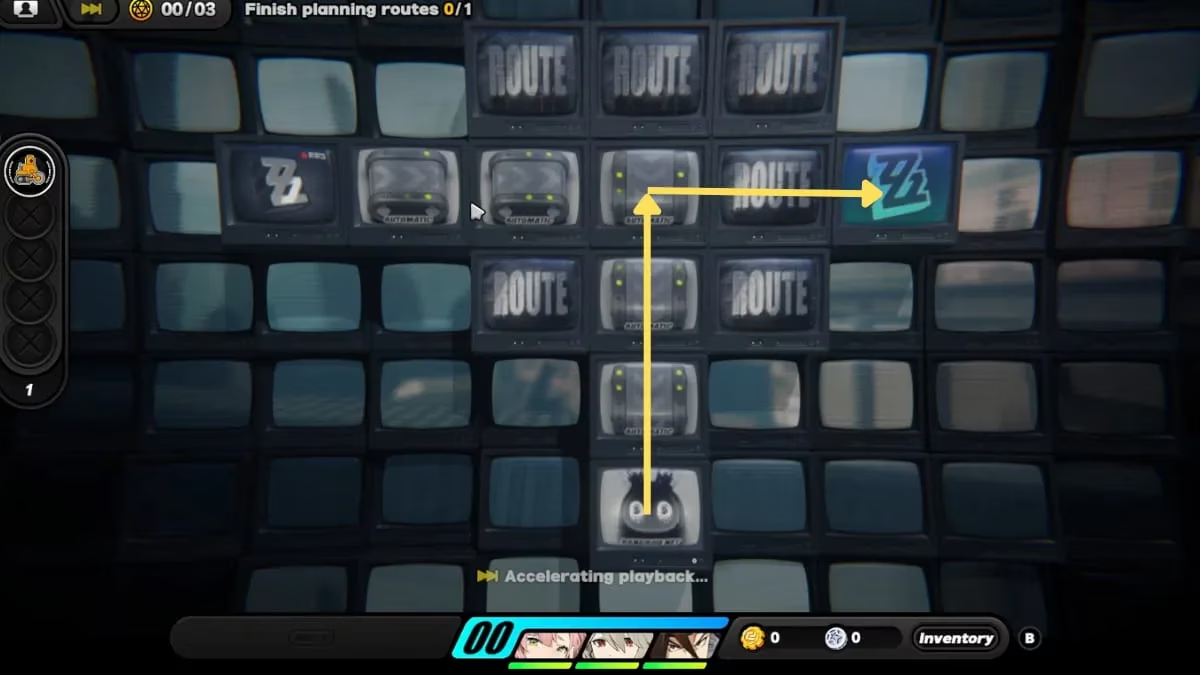
The developers kindly start you off with a route so simple even a malfunctioning Bangboo could handle it. Move the little fella toward the destination using the highlighted path. That’s it. No survivors to scoop up, no coins to worry about—just a pure, unadulterated "move from A to B" moment. Once you reach the delivery area, enter the rightmost cell to descend deeper into the Hollow. Enjoy the calm before the storm, because things are about to get spicy.
Route #2: One Bangboo Down, Countless Coins to Catch
Now the real fun begins. In the second route, you’ll spot the first survivor: a poor knocked-out Bangboo lounging on the left side like it owns the place. Rescuing it is mandatory, but the real challenge is snagging all the Gear Coins along the way. Follow the path shown below to collect both the survivor and the Gear Coins in one fluid motion.
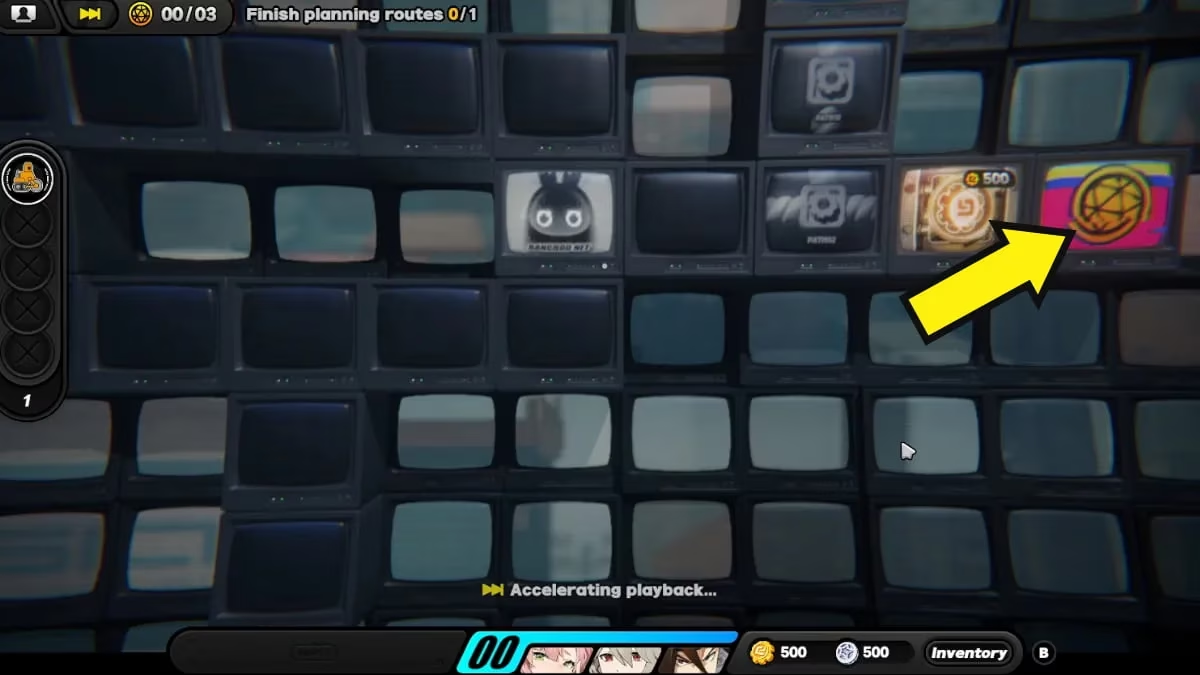
After finishing the route, don’t just pat yourself on the back and move on—that’s a rookie mistake. Head to the right and unlock the blocked path by paying 500 Gear Coins. This grants you access to the first piece of Hollow Observation Data. Remember, if you skip this step, you’ll end up with a commission completion that feels emptier than a Bangboo’s head on a Monday morning.
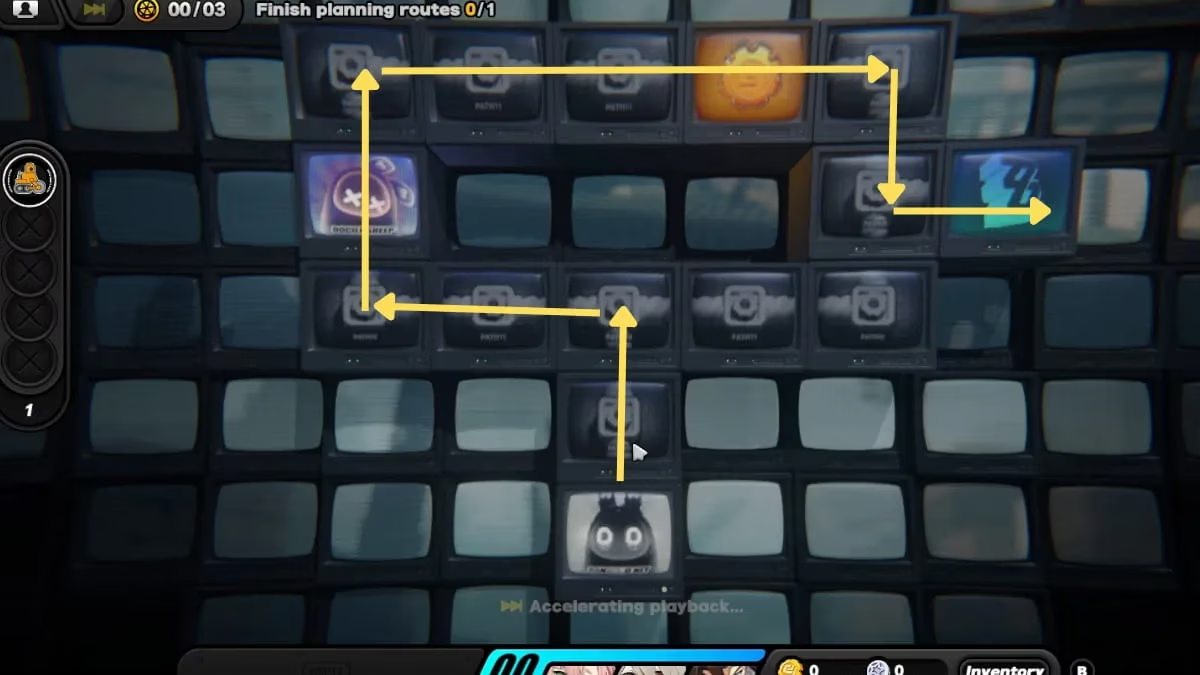
Route #3: Double Trouble, Triple Coin Stacks
Route number three throws not one, not two, but three sets of Gear Coins at you. The good news? You only need two of them to pay the upcoming fare. The better news? You might as well be a completionist and grab all three because the path I’ve mapped makes it ridiculously easy. Stretch that conveyor belt to cover both the survivor on the left and every glinting pile of coins. One clean sweep, and you’re done.
Once the survivor is safe and sound, claim your rewards and then mosey on over to the far right. Pay 1,000 Gear Coins to unlock the path and grab the second Hollow Observation Data. Feeling the rhythm yet? It’s all about that sweet, sweet coin management. Then, up you go into the deeper Hollow—no looking back.
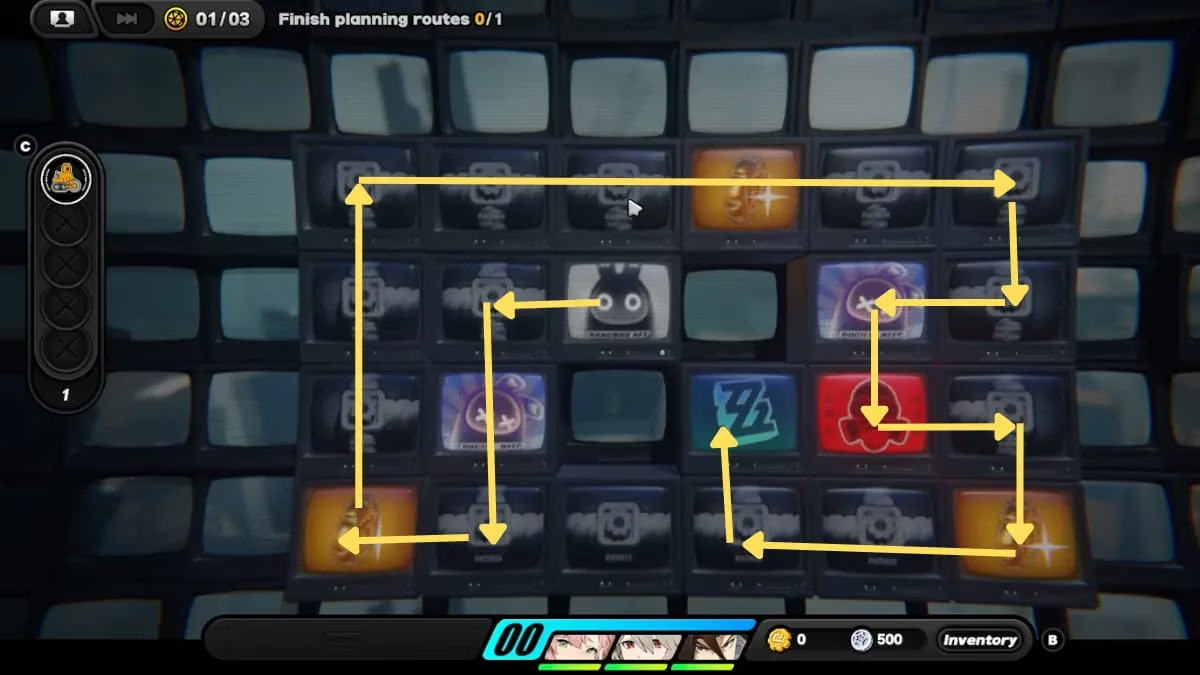
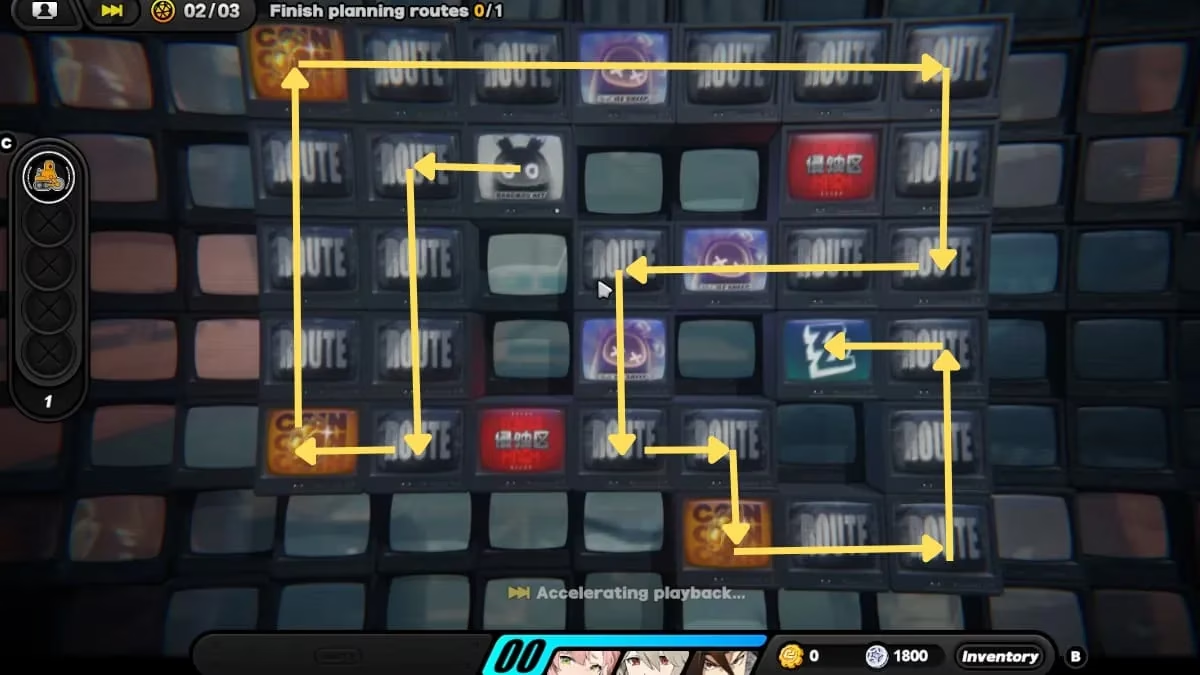
Route #4: The Grand Finale – Three Survivors, One Belt, No Second Chances
The final route is the whole enchilada. Three survivors, three sets of Gear Coins, and exactly zero room for error if you want that last Hollow Observation Data. Check out the plotted path below: it weaves through the map like a master chef threading skewers, collecting all survivors and coins in a single conveyor belt arrangement.

After you’ve successfully played the hero, take a deep breath and head to the rightmost section. Fork over 1,500 Gear Coins to unlock the final Hollow Observation Data. Congratulations, you now possess the holy trinity of observation data! Now hit the exit, brace yourself for one last skirmish, and call it a day. This commission is in the bag.
🗺️ Quick Recap Table for the Chronically Distracted
| Route | Survivors | Gear Coins Needed for Data | Hollow Observation Data | Key Tip |
|---|---|---|---|---|
| #1 | 0 | – | – | Don’t overthink it. |
| #2 | 1 | 500 | #1 | Pay immediately; that data won’t collect itself. |
| #3 | 1 | 1,000 | #2 | Grab all three coin stacks even though two suffice—why leave money on the table? |
| #4 | 3 | 1,500 | #3 | The conveyor belt path must touch every survivor and coin pile. No skipping! |
And there you have it—a flawless run through Survivor Rescue, completed with the swagger of a Proxy who’s seen it all. The Hollows might be unpredictable, but with this guide your planning phase will be smoother than a well-oiled gear. Now go forth, rescue those Bangboo, and never let a Gear Coin go unclaimed. 🪙✨
Comments